
MEL Science Kit Review

MEL Science is a new (to me) company that sends science kits to your home on a monthly basis. They include all of the materials that you need for the experiment other than some basics, like water.
MEL reached out to me about doing a review for them. They provided the product for free in exchange for an honest review.
Heads up: This post contains affiliate links. That just means, if you use one of my links to a product, I may earn a commission on that purchase, but it won’t cost you any extra money. Read more
Contents of the Box

The kit arrived in a compact box, about 2x10x5 inches. The colorful picture of the product itself covered the front, so we immediately knew which fun experiment awaited us. In this case, we received the Hydraulic Lift.
I have included a lot of photos, but as you will see I am not going to be nominated for any photography awards. ;-)
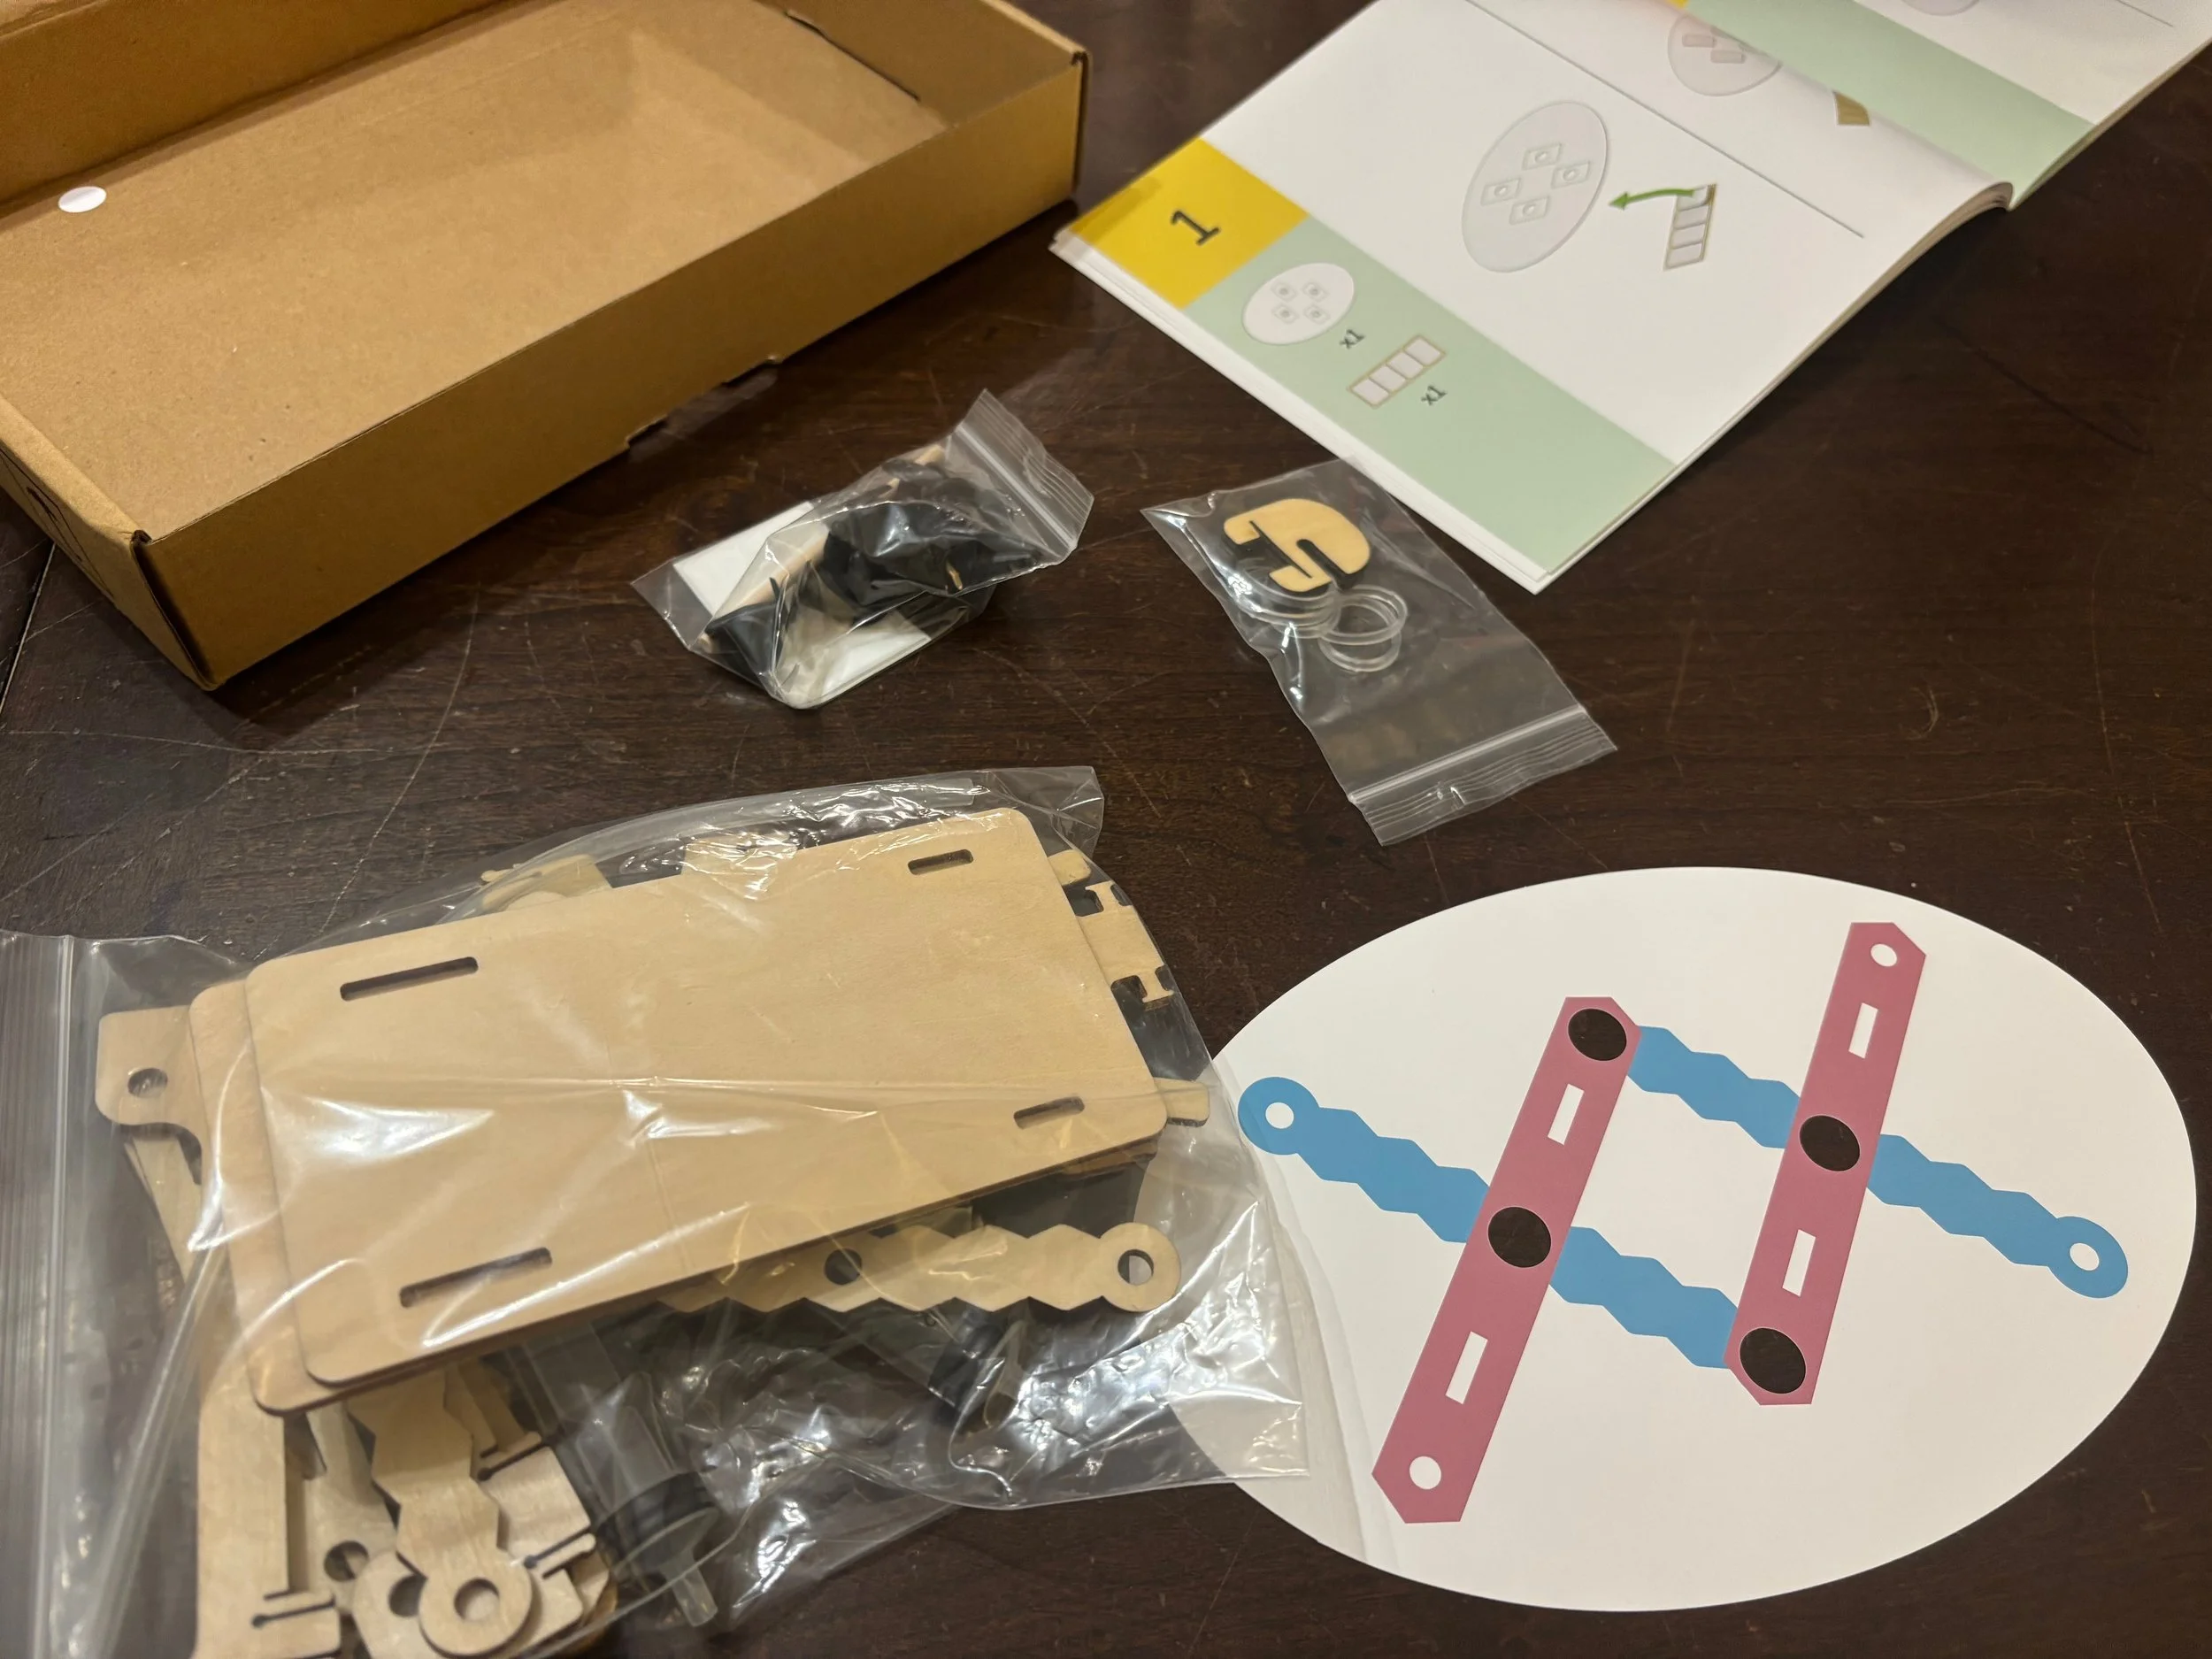
After opening the box, we found all the needed supplies to build the lift and conduct the experiment, except for the water.
The inside of the box included a QR code with access to “the app.” In reality there were multiple apps that corresponded to this experiment, but more on those later…
The various items were contained in several ziplock bags, as shown in the picture. I really liked how we didn’t have to go find scissors to open the bags - and they could even be reused.
Booklets
Along with the building supplies, this kit included 2 half-page size booklets and a folded map. Each was printed in full-color on thick, coated paper. I’m a paper snob, so I really appreciated the quality of these.
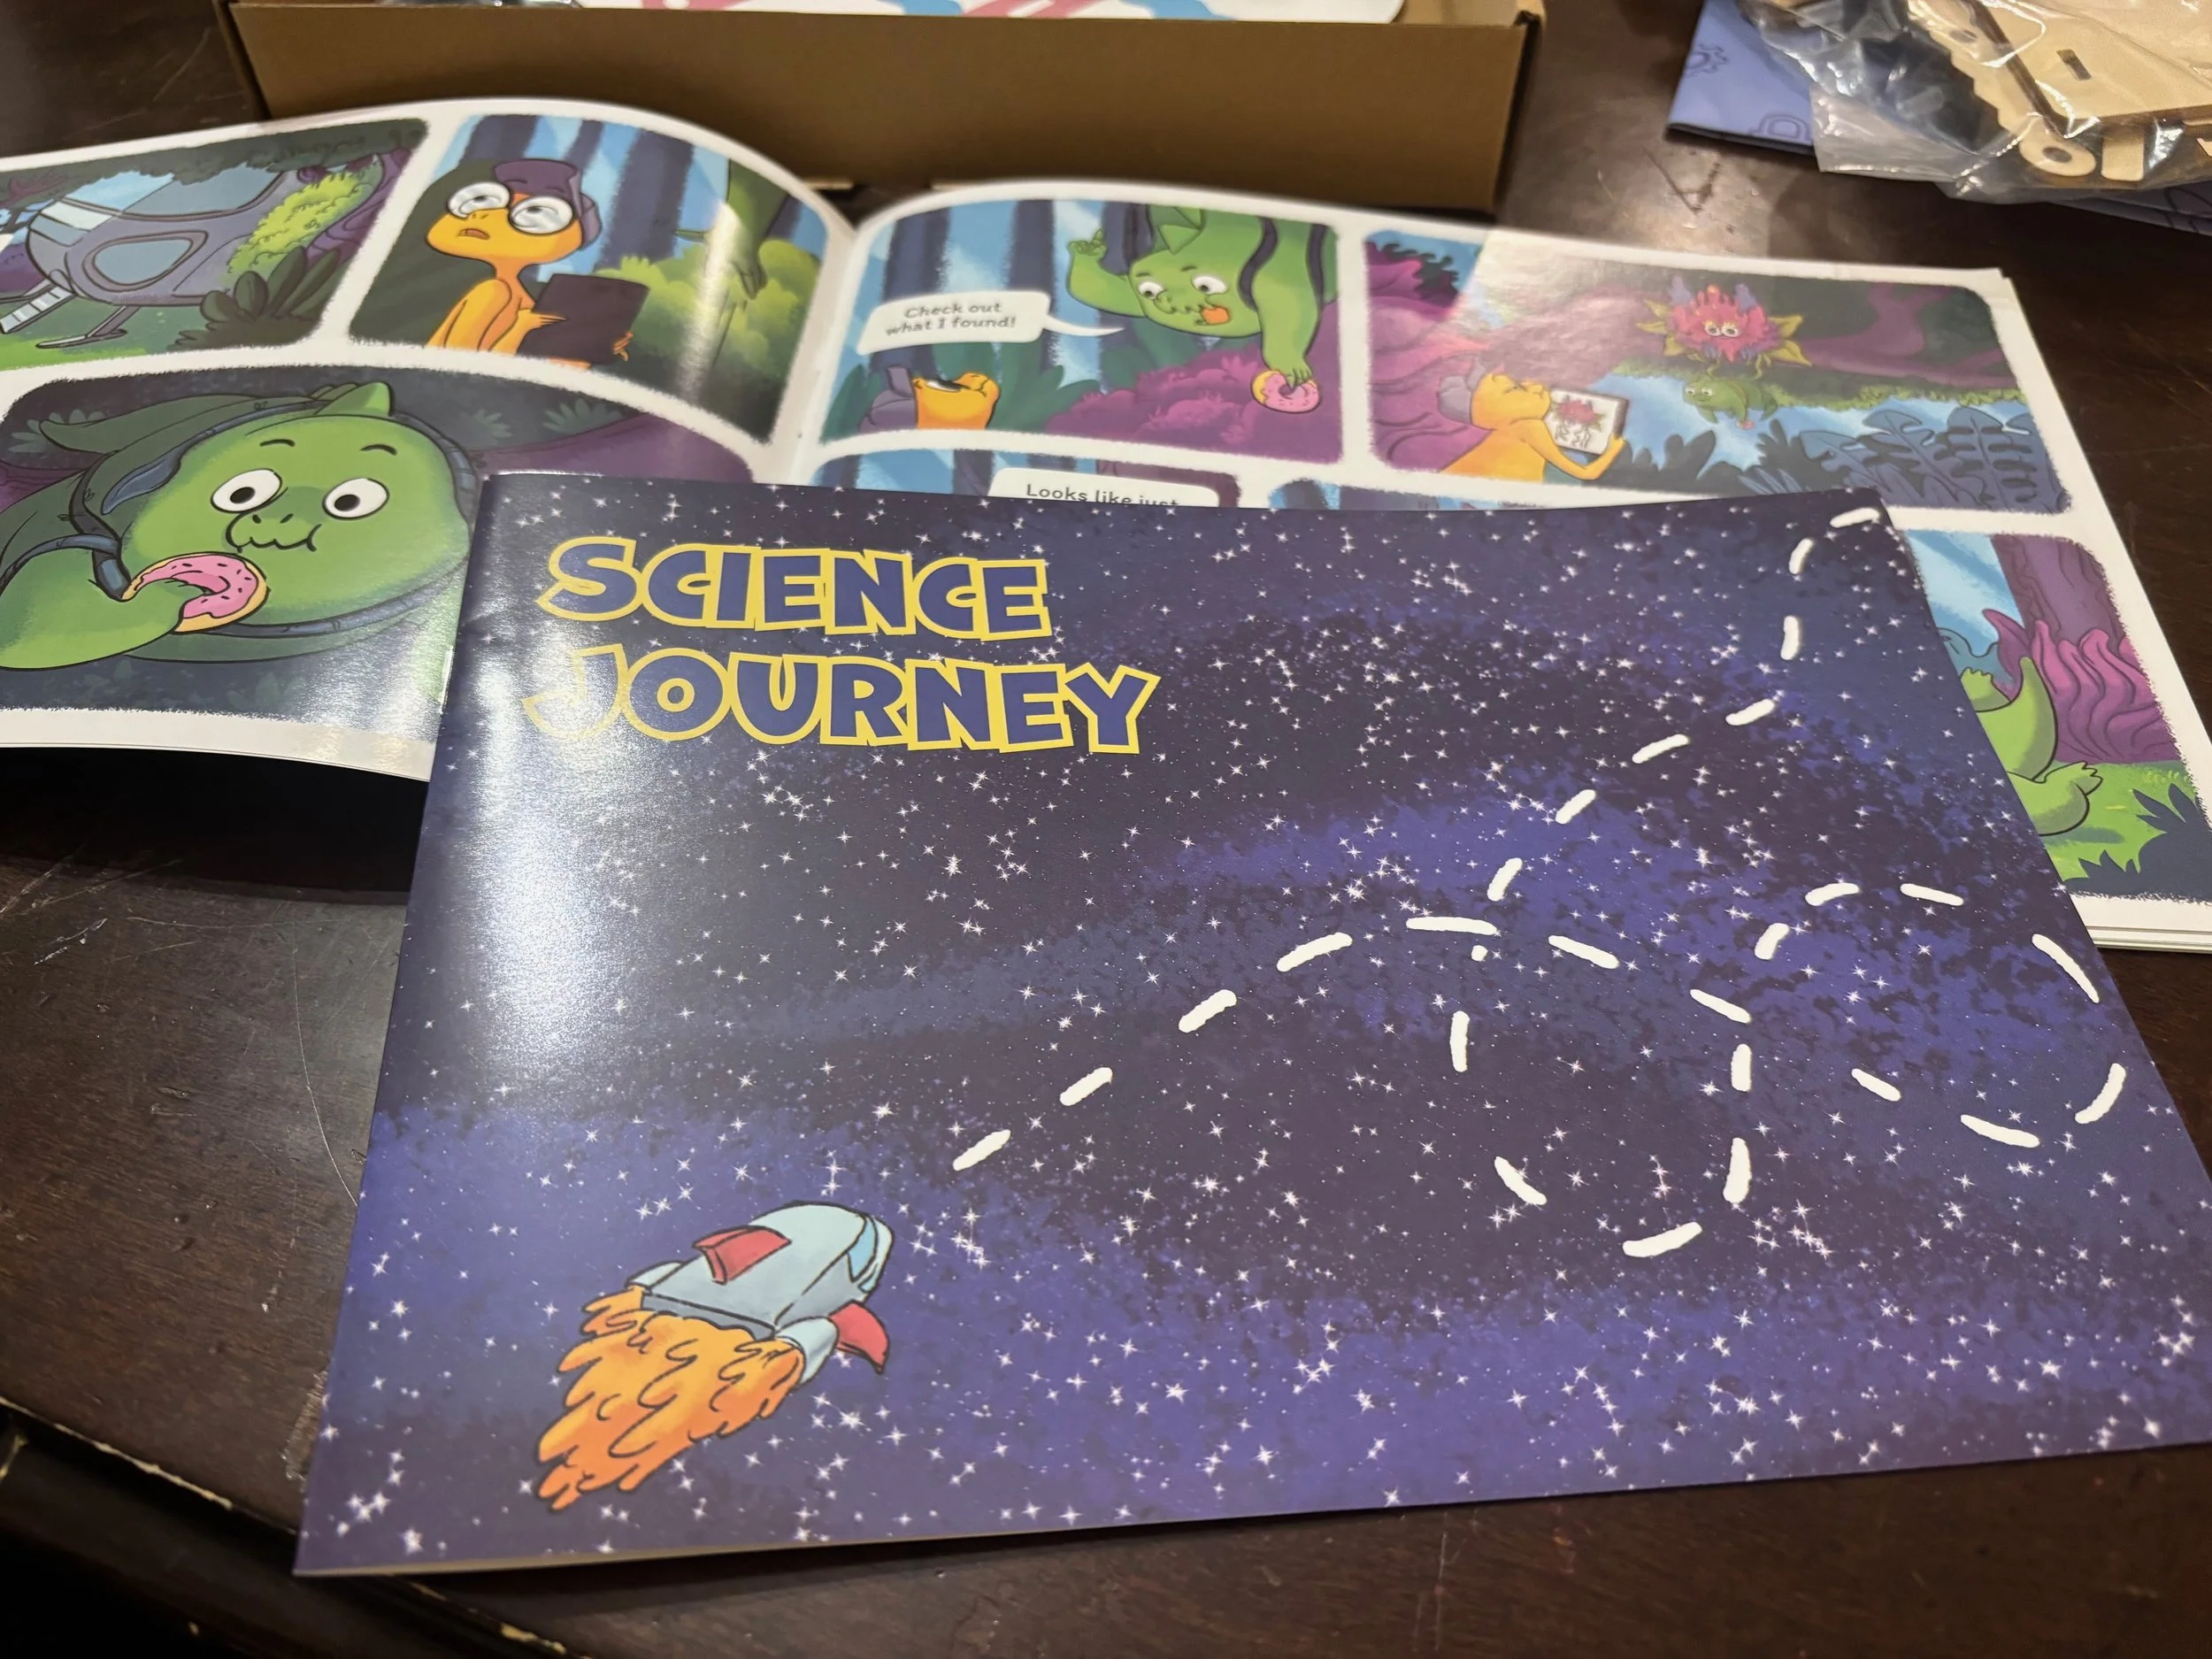
Science Journey
This first booklet sets up the story for the comic-style series that is continued in the instruction booklet (see Hydraulic Lift section below). The cartoon style story is about seven pages long and ends with “to be continued…” (presumably in future boxes). I assume the Science Journey booklet is only sent in the first box for each customer.
Mystery Planet Map
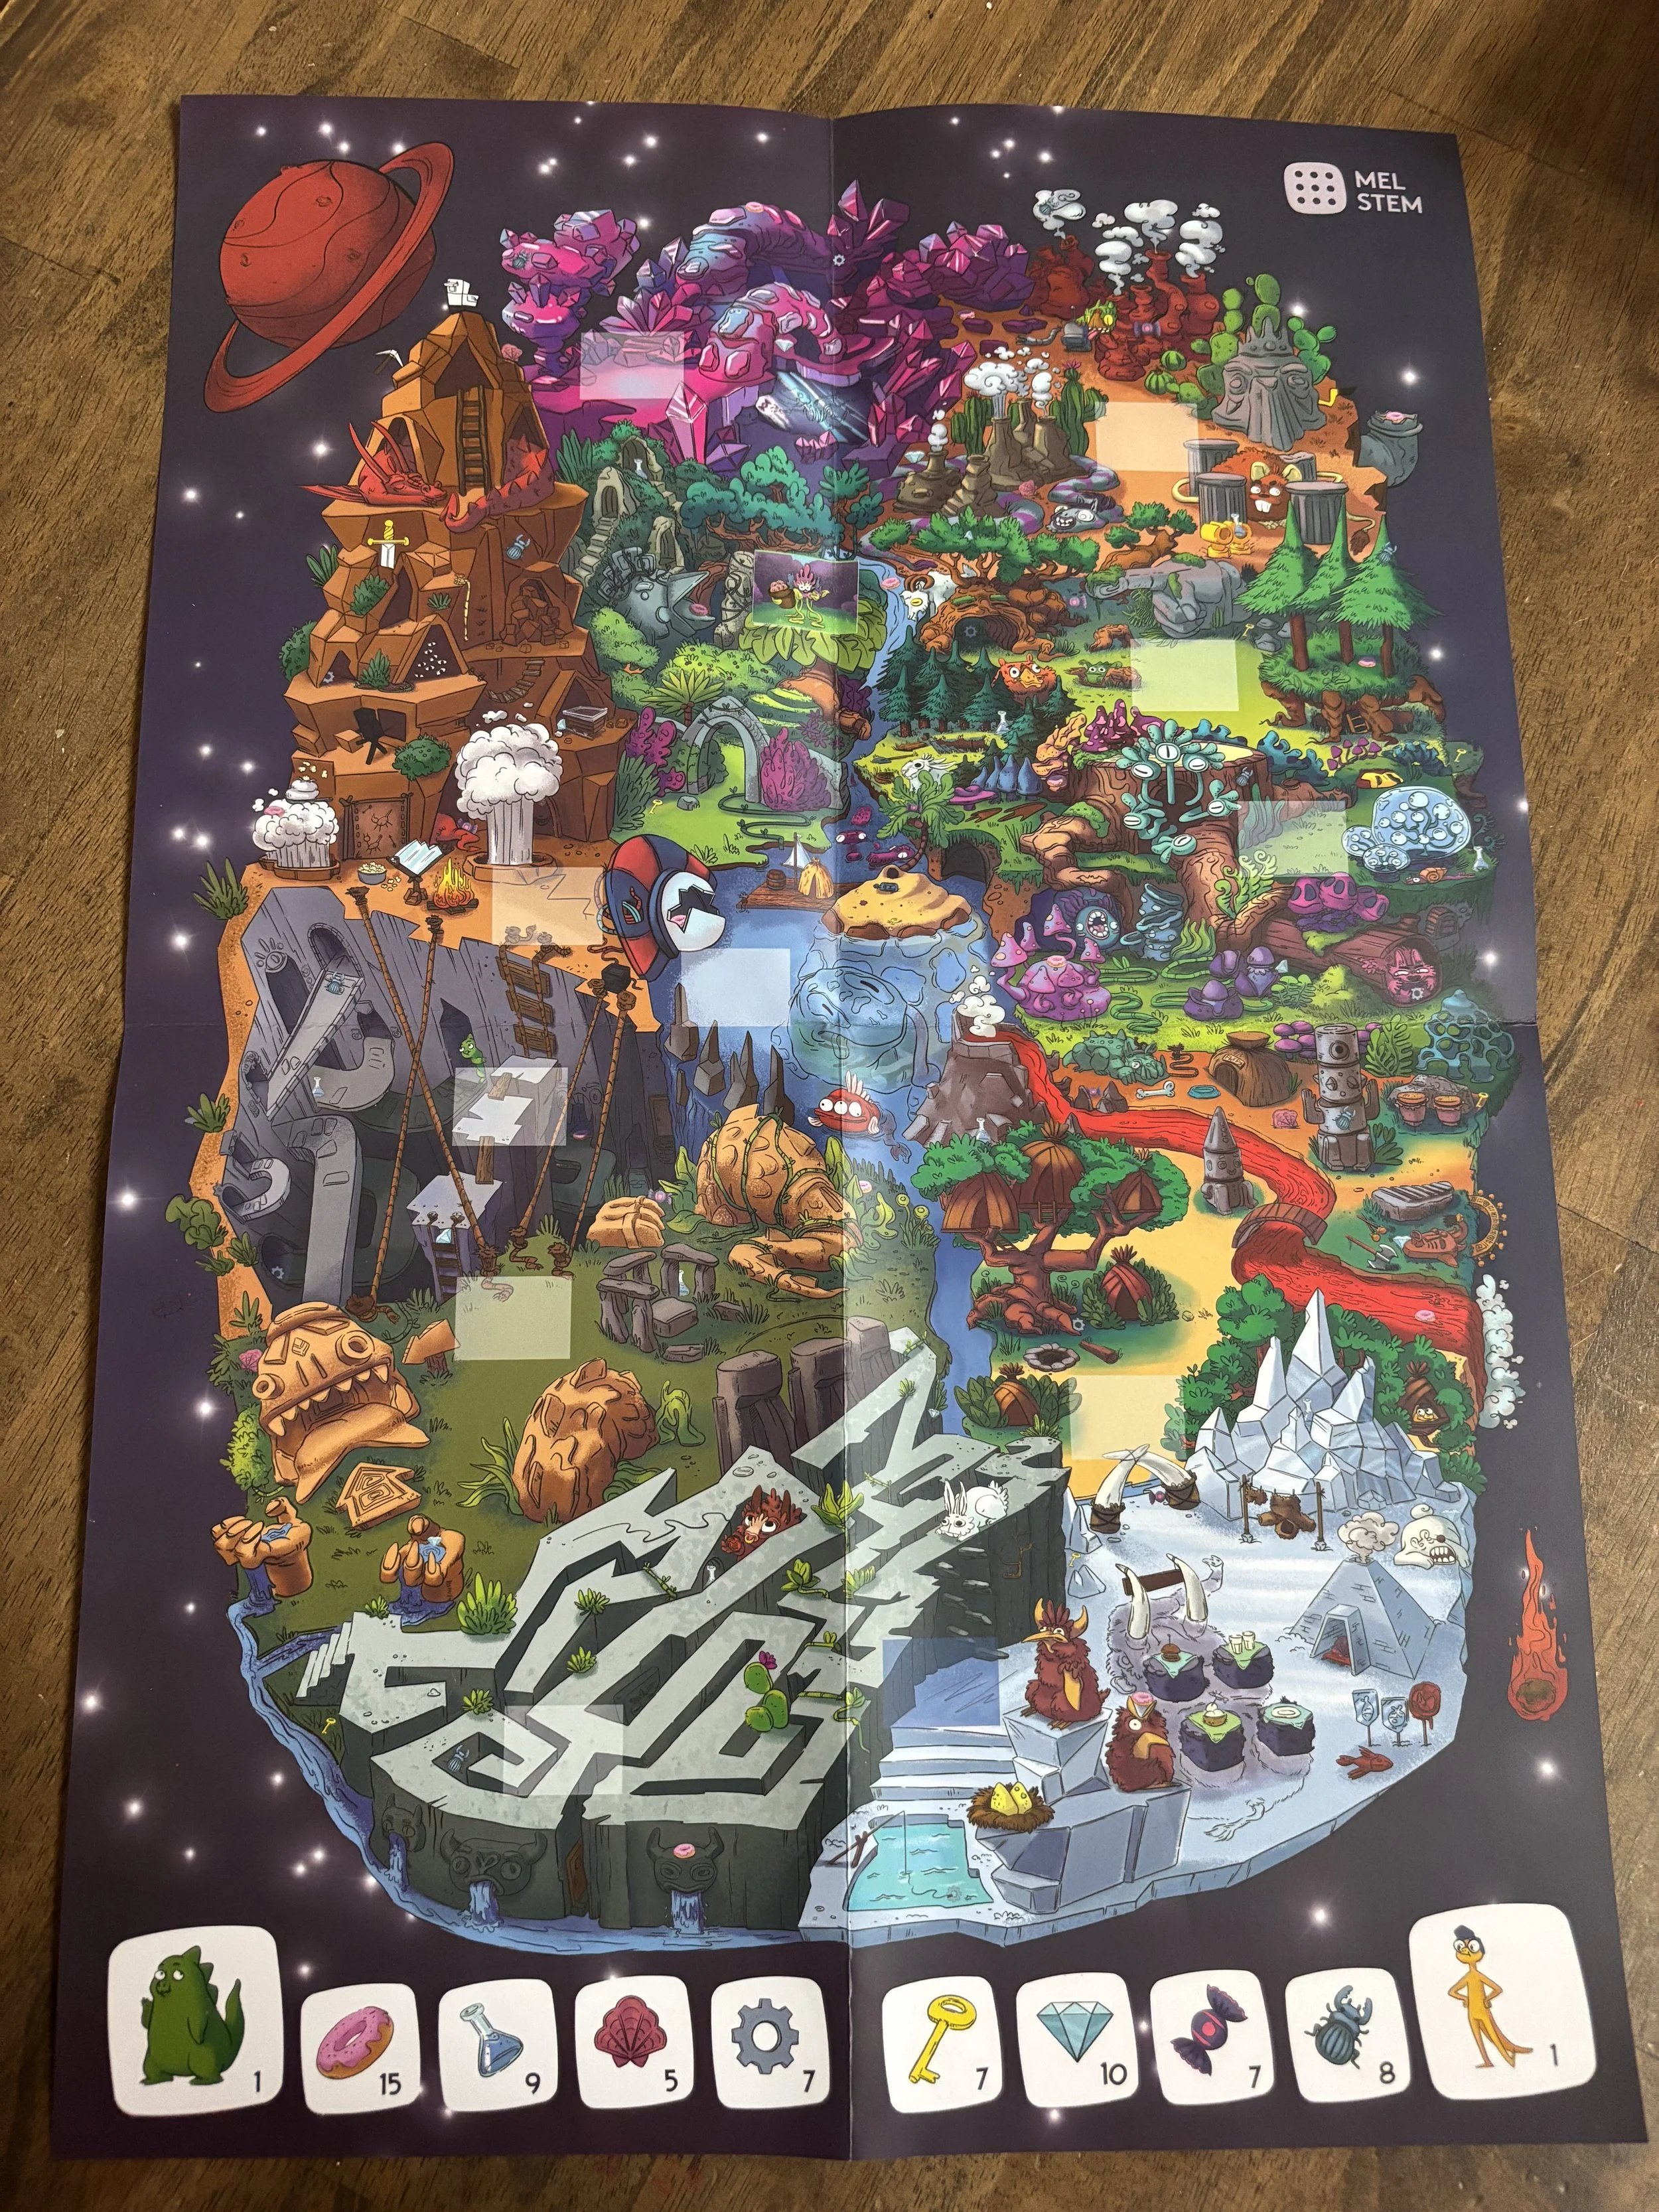
The map unfolded to reveal a large, colorful seek-and-find style maze of pictures. Each of the STEM boxes comes with a sticker that your child can place on the map. It took a minute for my kid to find the right spot because of how intricate this is, which was a fun little “extra.”
In addition to the stickers, the map includes a list of items that you can search and find hidden throughout the map. This would make a fun poster to hang on the wall in your school area. Again, presumably this is only sent in the first subscription box.
Hydraulic Lift (Instruction Booklet)
This was the thickest of the pamphlets with over 30 pages of content. I am going to break down each section below (the pages were not numbered). You’ll see that the actual instructions are interspersed between other parts of the booklet, from lists of supplies, to cartoons, to additional activities or suggestions.
List of Components - including pictures and names of each part. Shown on the first page.
Cartoon - 4 pages that continue the story of the critters from the “Science Journey” booklet. In this case they are trying to complete a mission which includes gathering a specific plant. However, they have to build something to get it down from the tree, using their instruction book.
Blueprint - (1 page) Top, bottom, and side view diagram of the project on a blueprint style background.
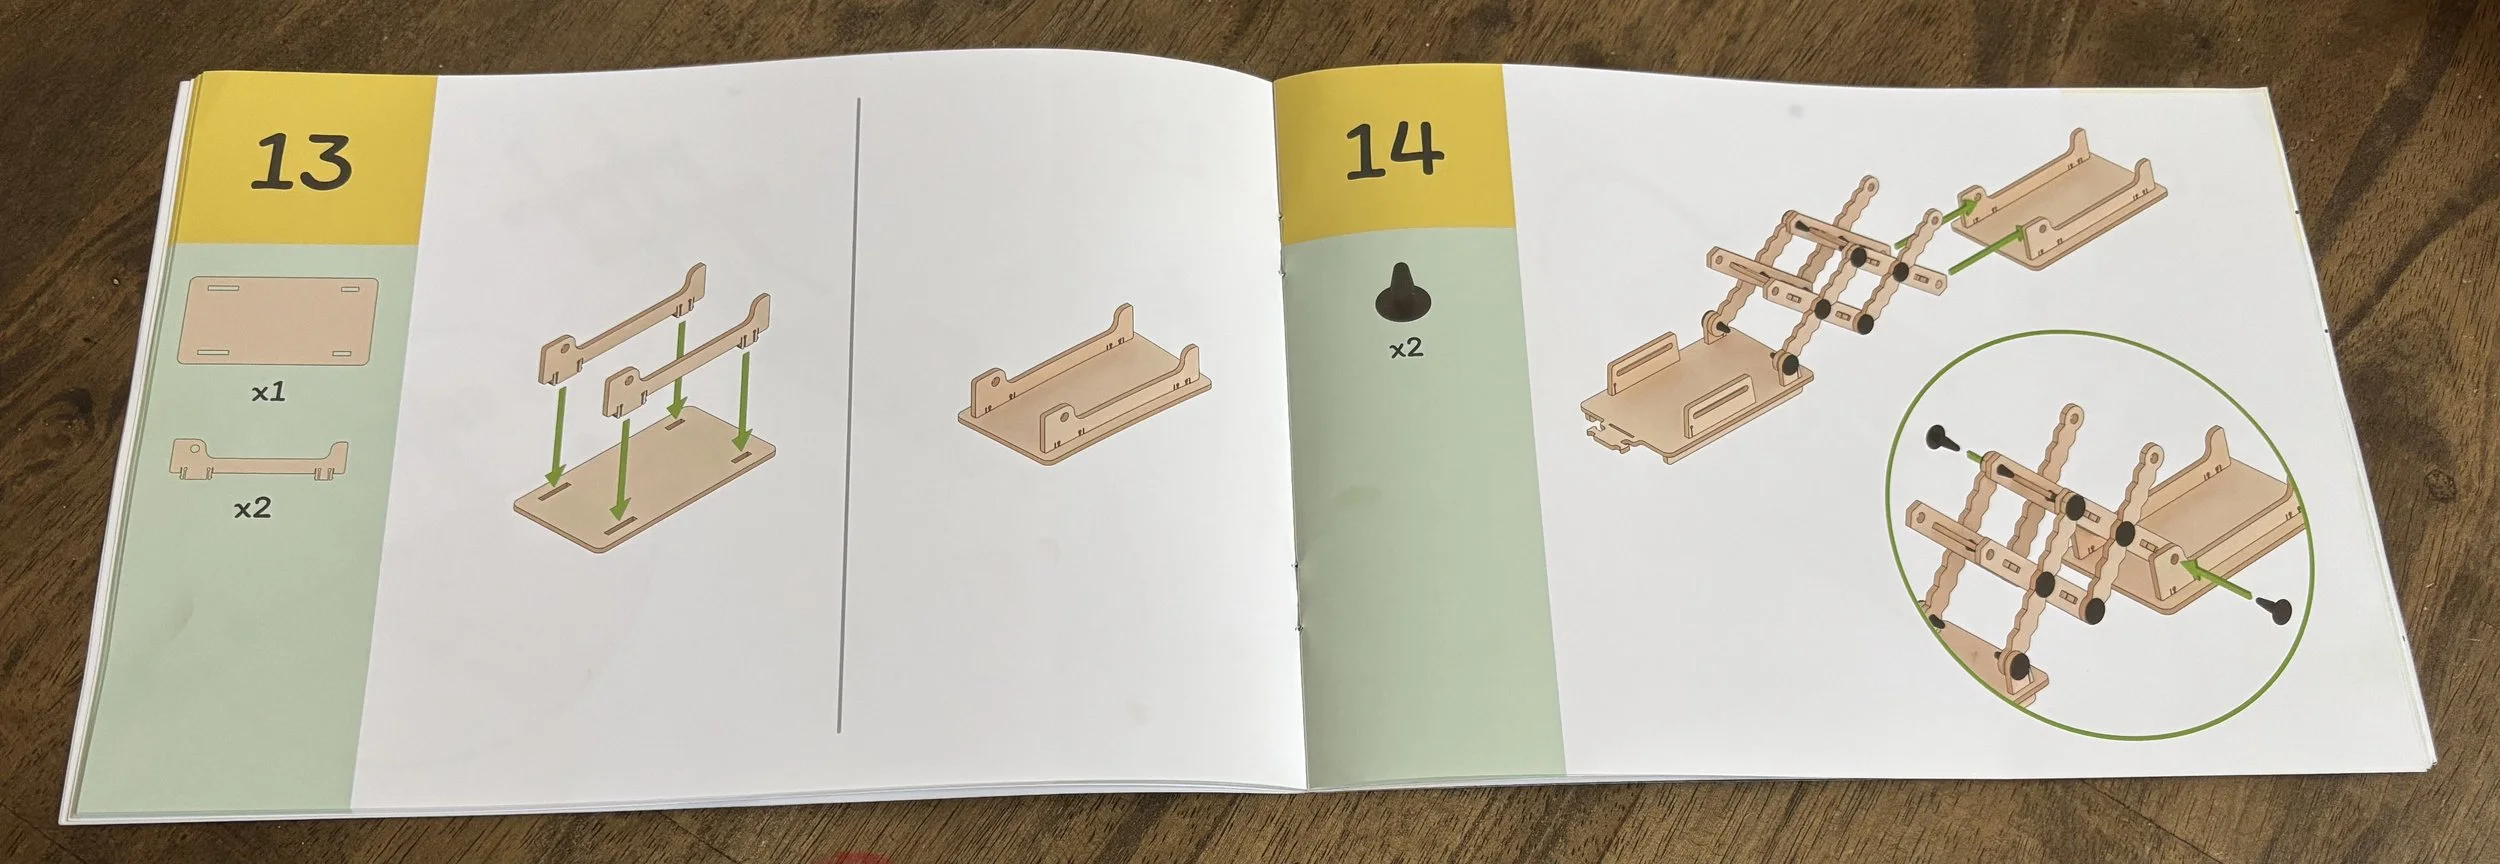
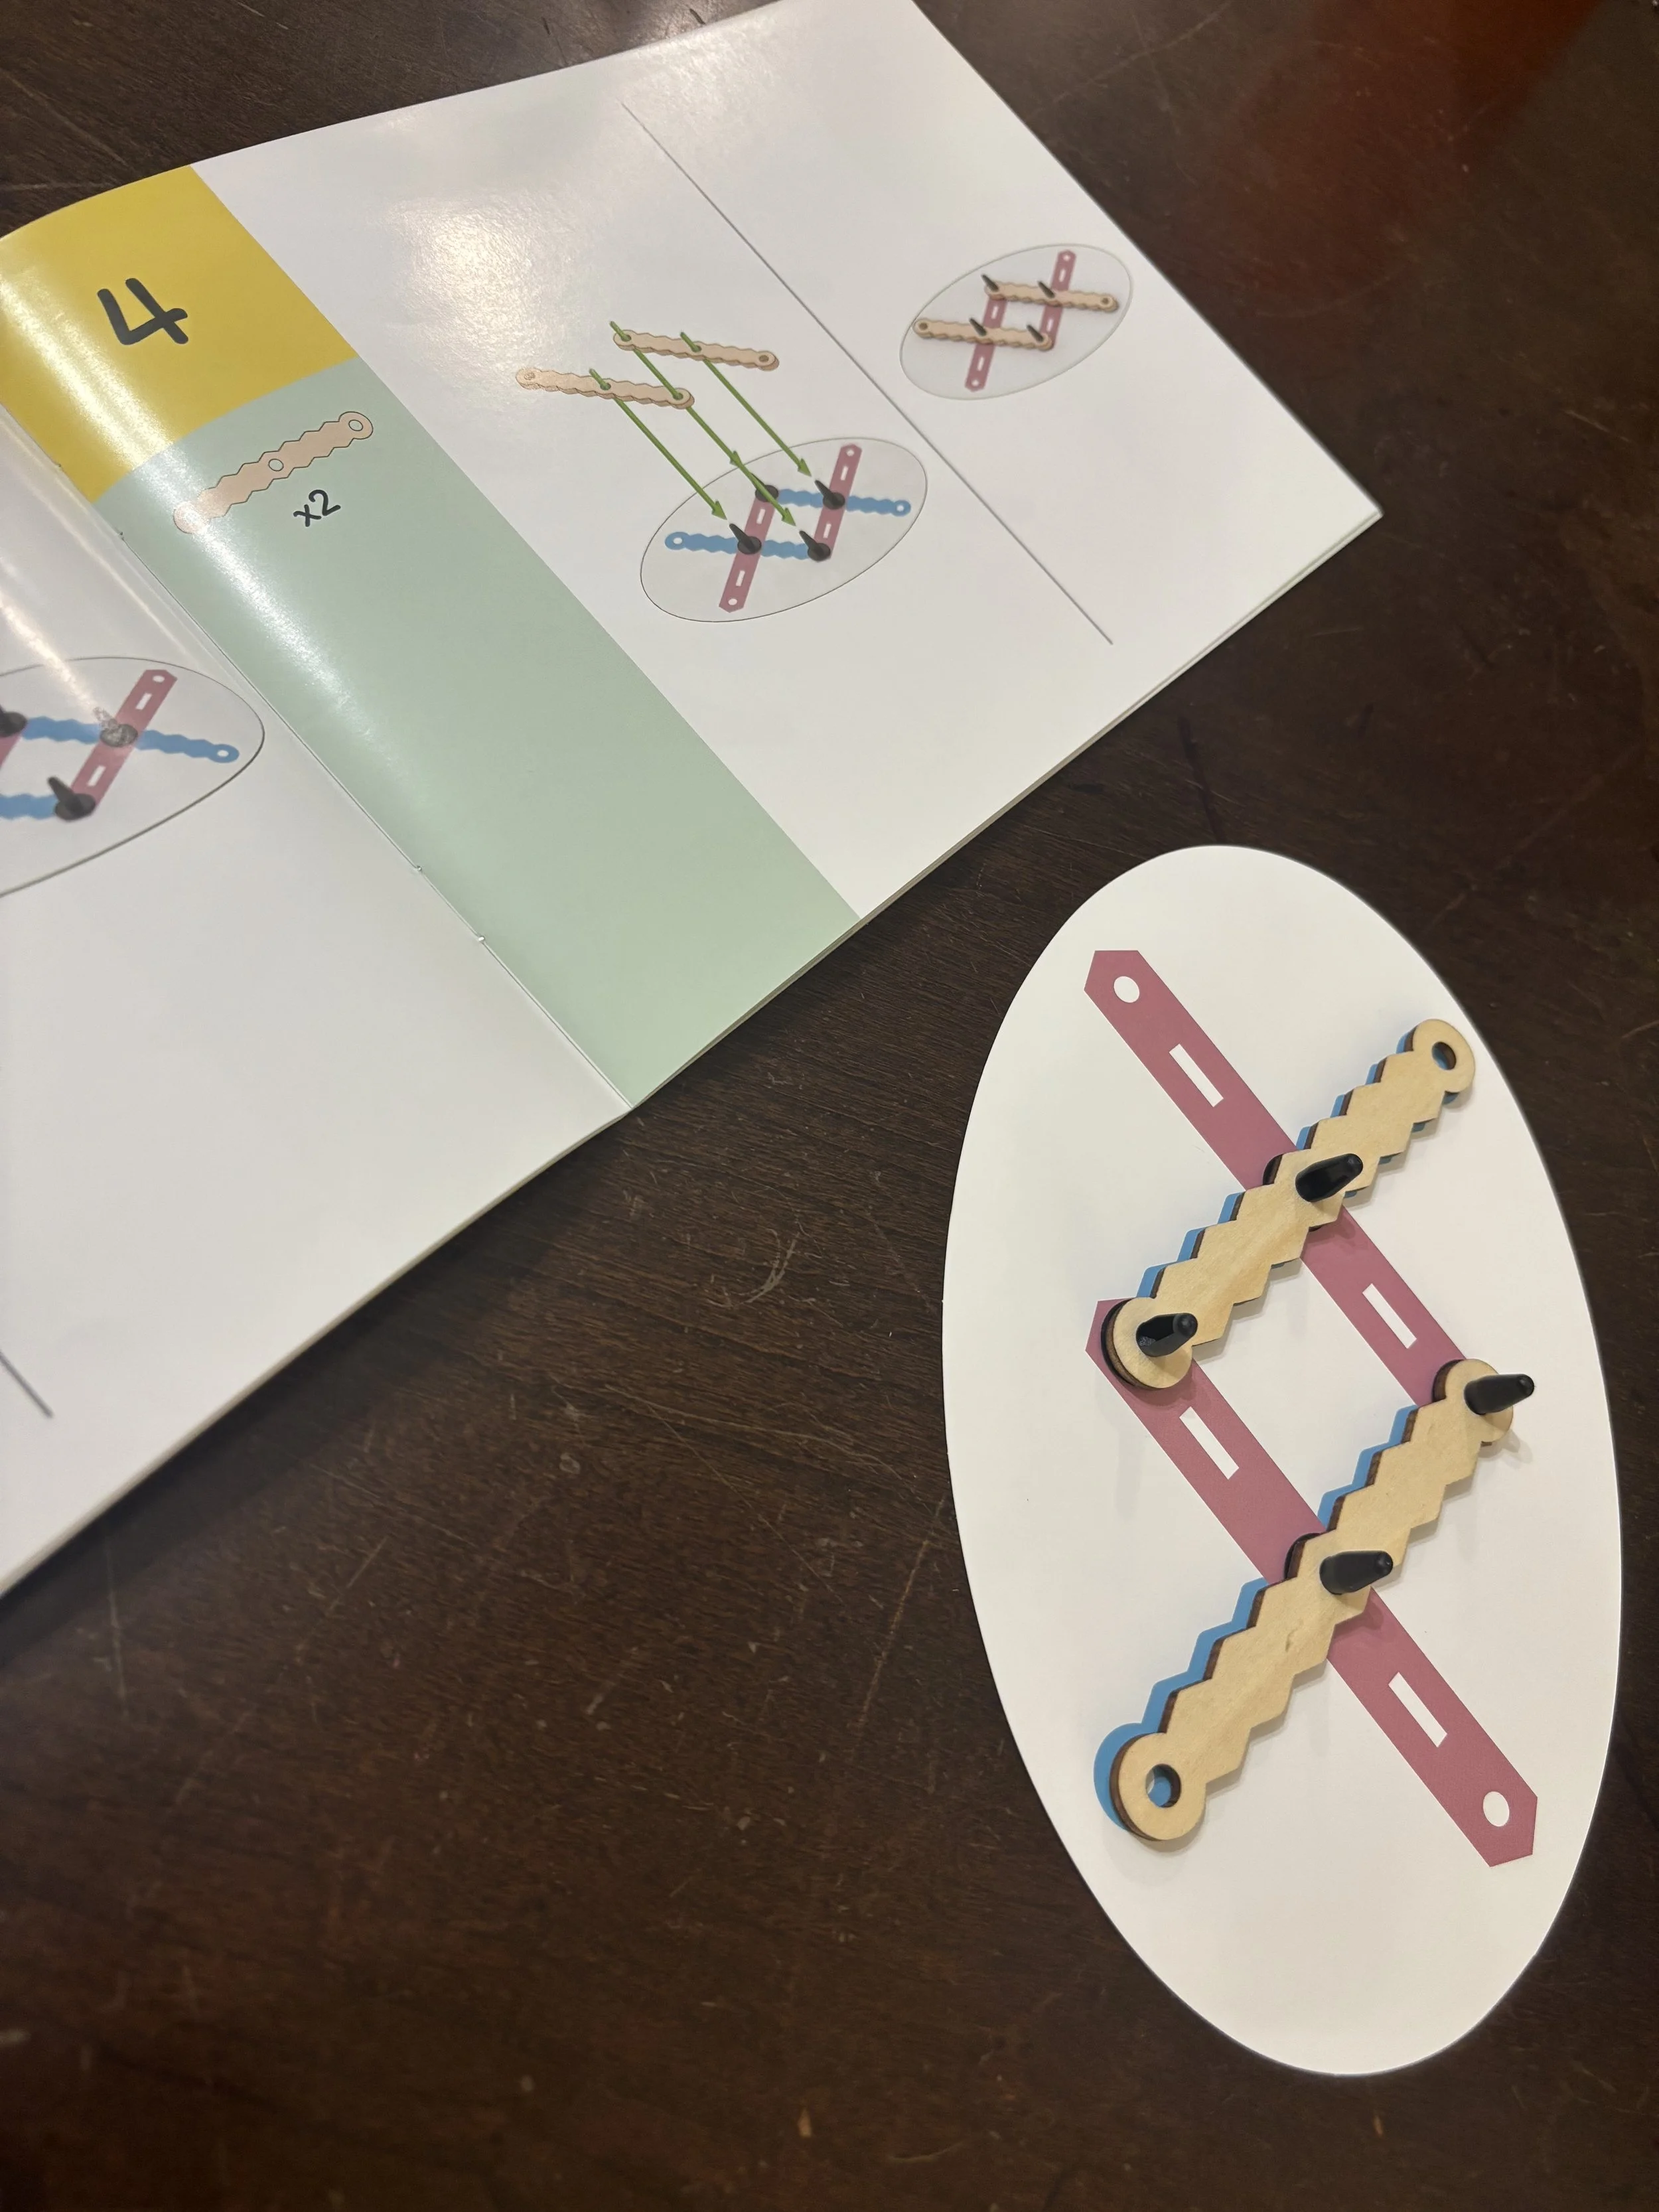
Step-by-Step Instructions (#1-17) - These were in picture format only, which reminds me of LEGO kits (see the photo above). The new pieces needed for the step were shown on the left side of the page followed by images of how to add them to the build. There were no words included in these instructions.
Cartoon Continued - Again, the cartoon picks up where they left off with two more pages where the animals (like your child) have built the mechanical part of the lift but need to create the hydraulic system.
Final Step-by-Step Instructions (#18-24) - The remaining instructions are included in the same style as the first 17.
Cartoon Finale - The cartoon continued on two more pages as they accomplish their mission, and are presumably on to bigger and better adventure.
Sticker Placement - The next page shows where the box’s sticker fits on the Mystery Planet Map.
The Science of Hydraulics - One page with both words and pictures included an additional experiment that could be tried with oil instead of water. (Oil was not included in the kit.)
Hydraulics in Everyday Life - This 2-page spread showed two pictures of hydraulic lifts used in real life.
Science in Augmented Reality - References the CuriosityQ app (see the section below about the apps). It shows the “card” which you’re supposed to be able to scan, but I couldn’t get that to work. Instead, I used the QR code beside it.
Color the Picture - This was a really cute idea, and my youngest did start to color it with marker. Just be aware that because of the coating on the paper it may take longer to dry than a regular piece of paper. You could probably copy the image if you wanted all of your kids to get to color it. Then you wouldn’t have the issue with the glossy paper.
Spot 7 Differences - The final 2-page spread in this booklet is a spot the differences activity in the same theme as the cartoon. You could have a kid circle the differences, but because of the glossy page and the dark colors I think it would work best just to point them out, which means multiple kids can do this!
Assembling the Lift
Although this box says it is intended for ages five and up, my fourth grader helped me complete it. He probably could have done it on his own, but I wanted to participate since I was writing this article to review it.
We found the instructions pretty straight-forward and easy to follow. Again, this child is older than the minimum target age and has lots of experience putting similar science kits and LEGO kits together.
Just like with LEGO sets, you have to carefully make sure you are orienting the items correctly so you don’t put something on backwards.
The process of building the kit only took us about 10-15 minutes.
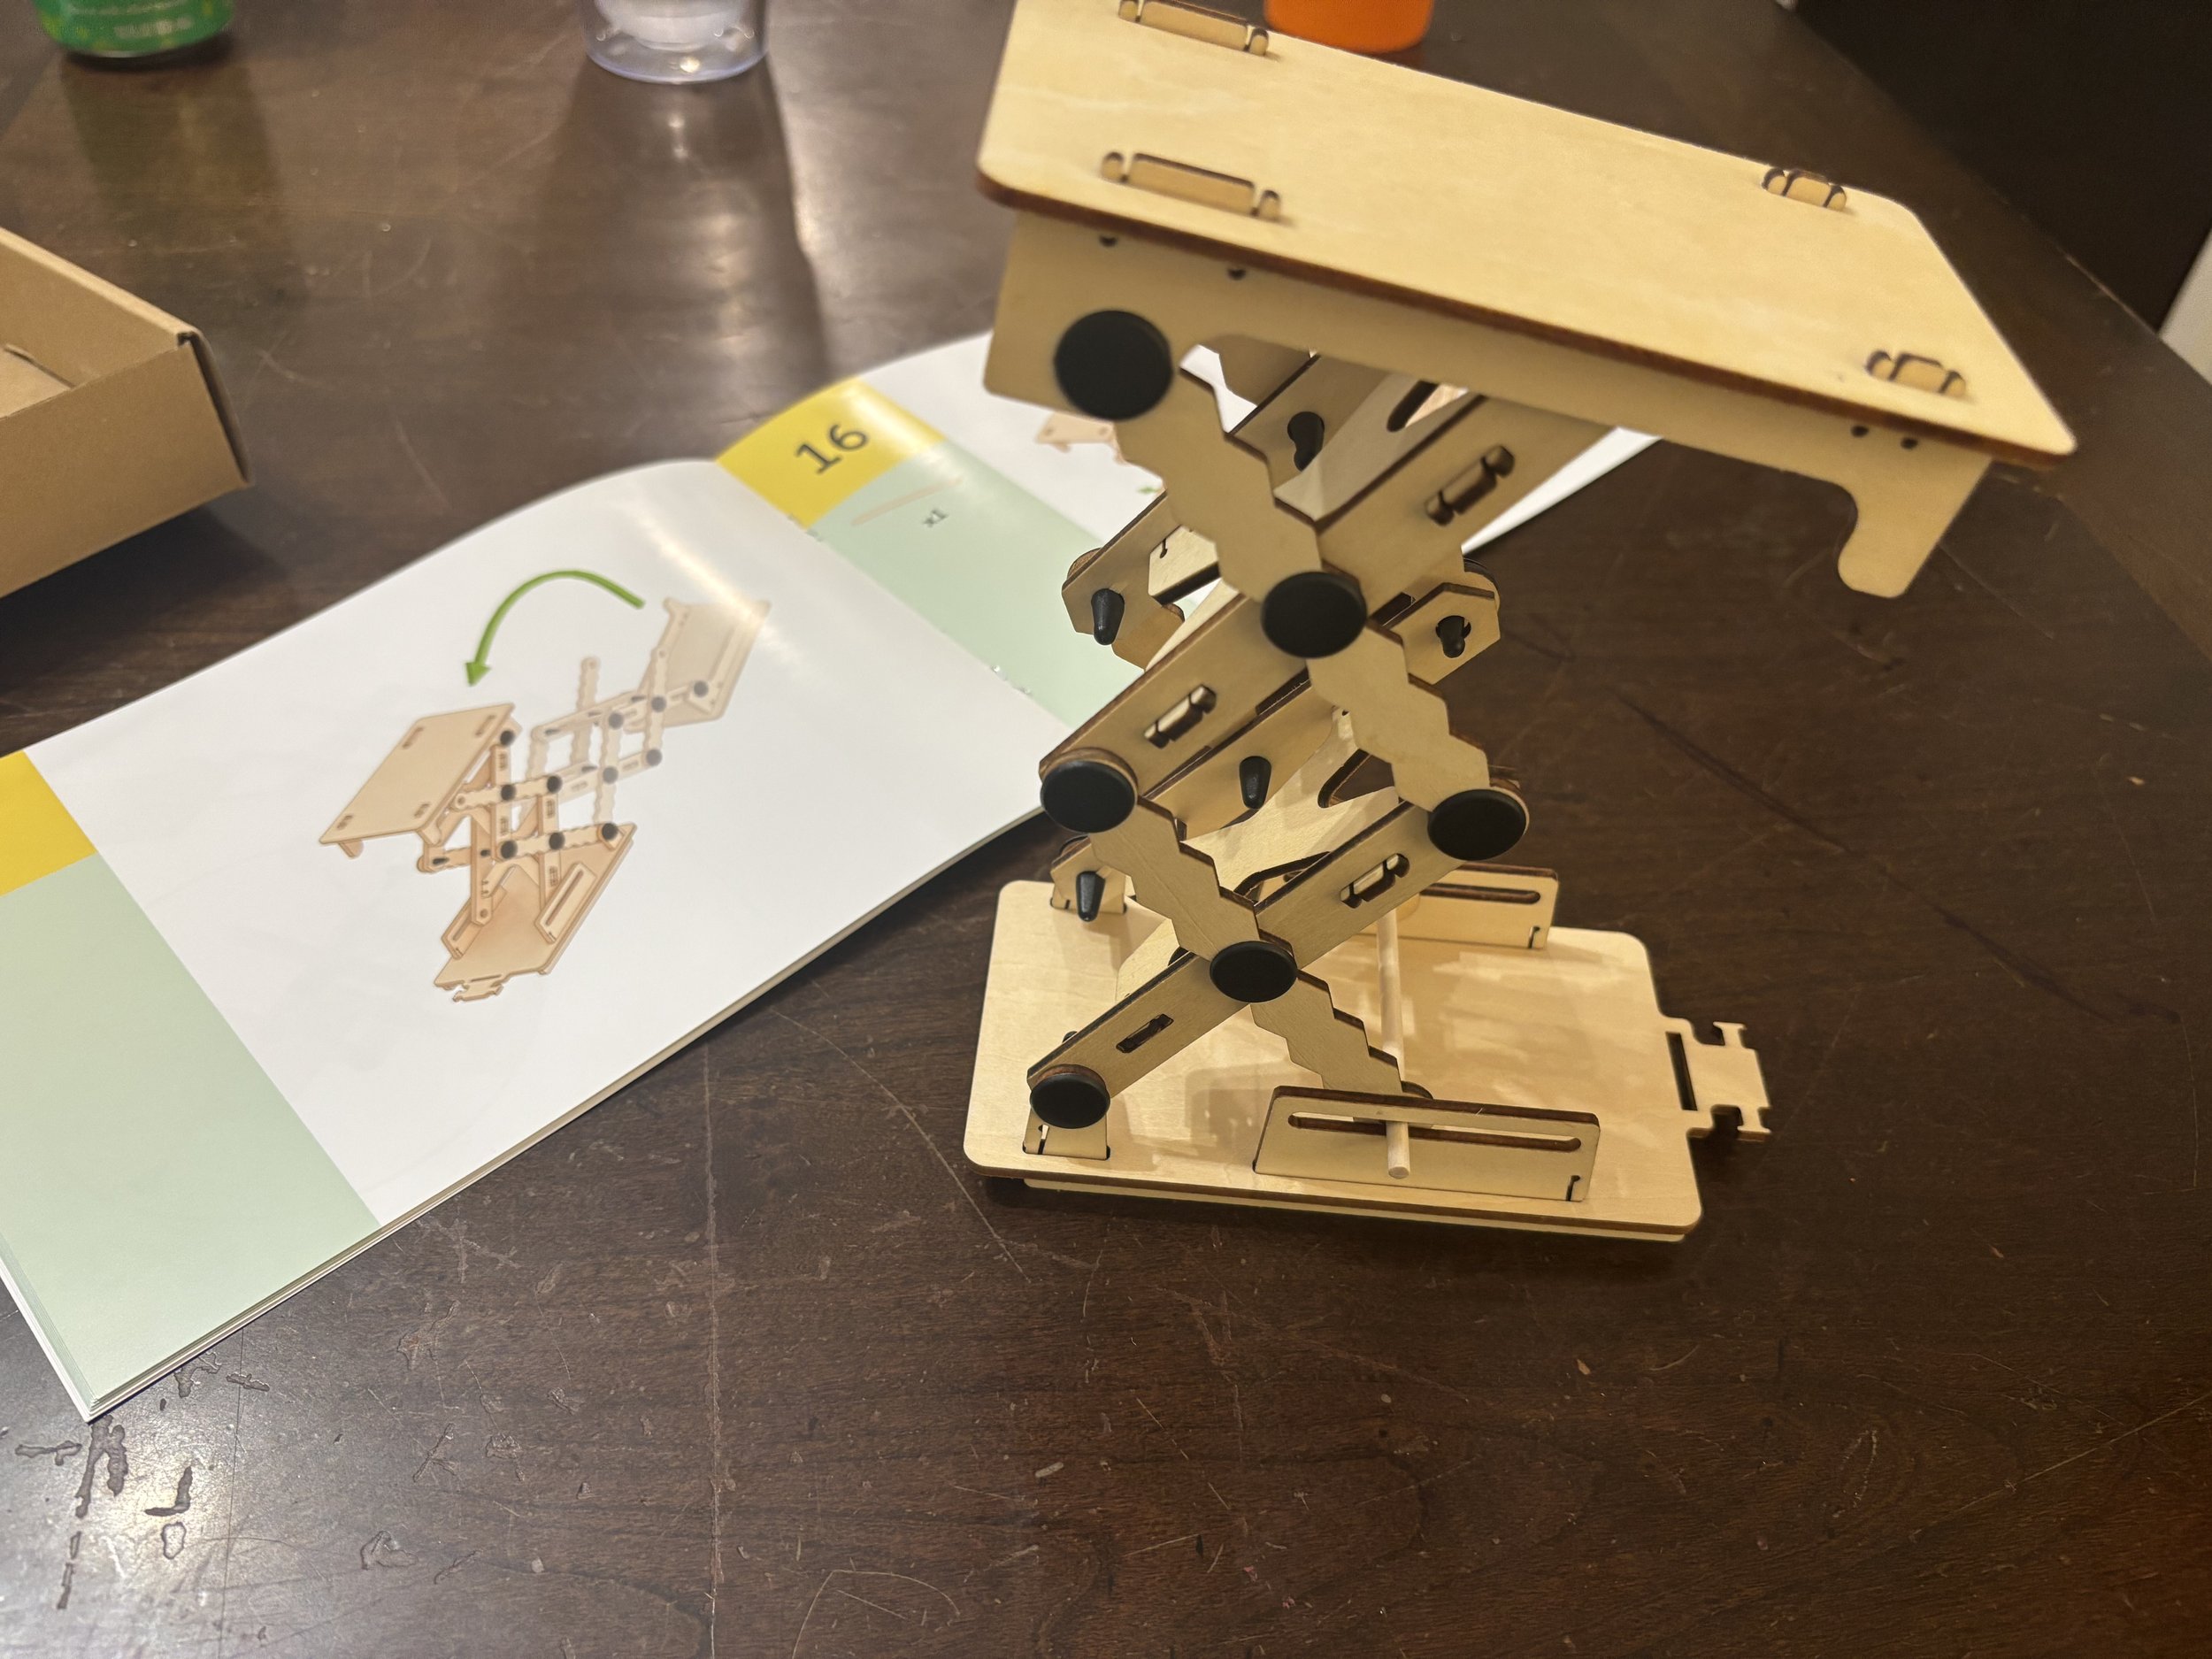
Here’s an image of the finished product. My son really enjoyed building this and even exclaimed at one point, “It’s so cool! It’s like watching magic!” You can see a demo video below.
Demo of completed Hydraulic Lift
“It’s so cool! It’s like watching magic!”
- my fourth grader
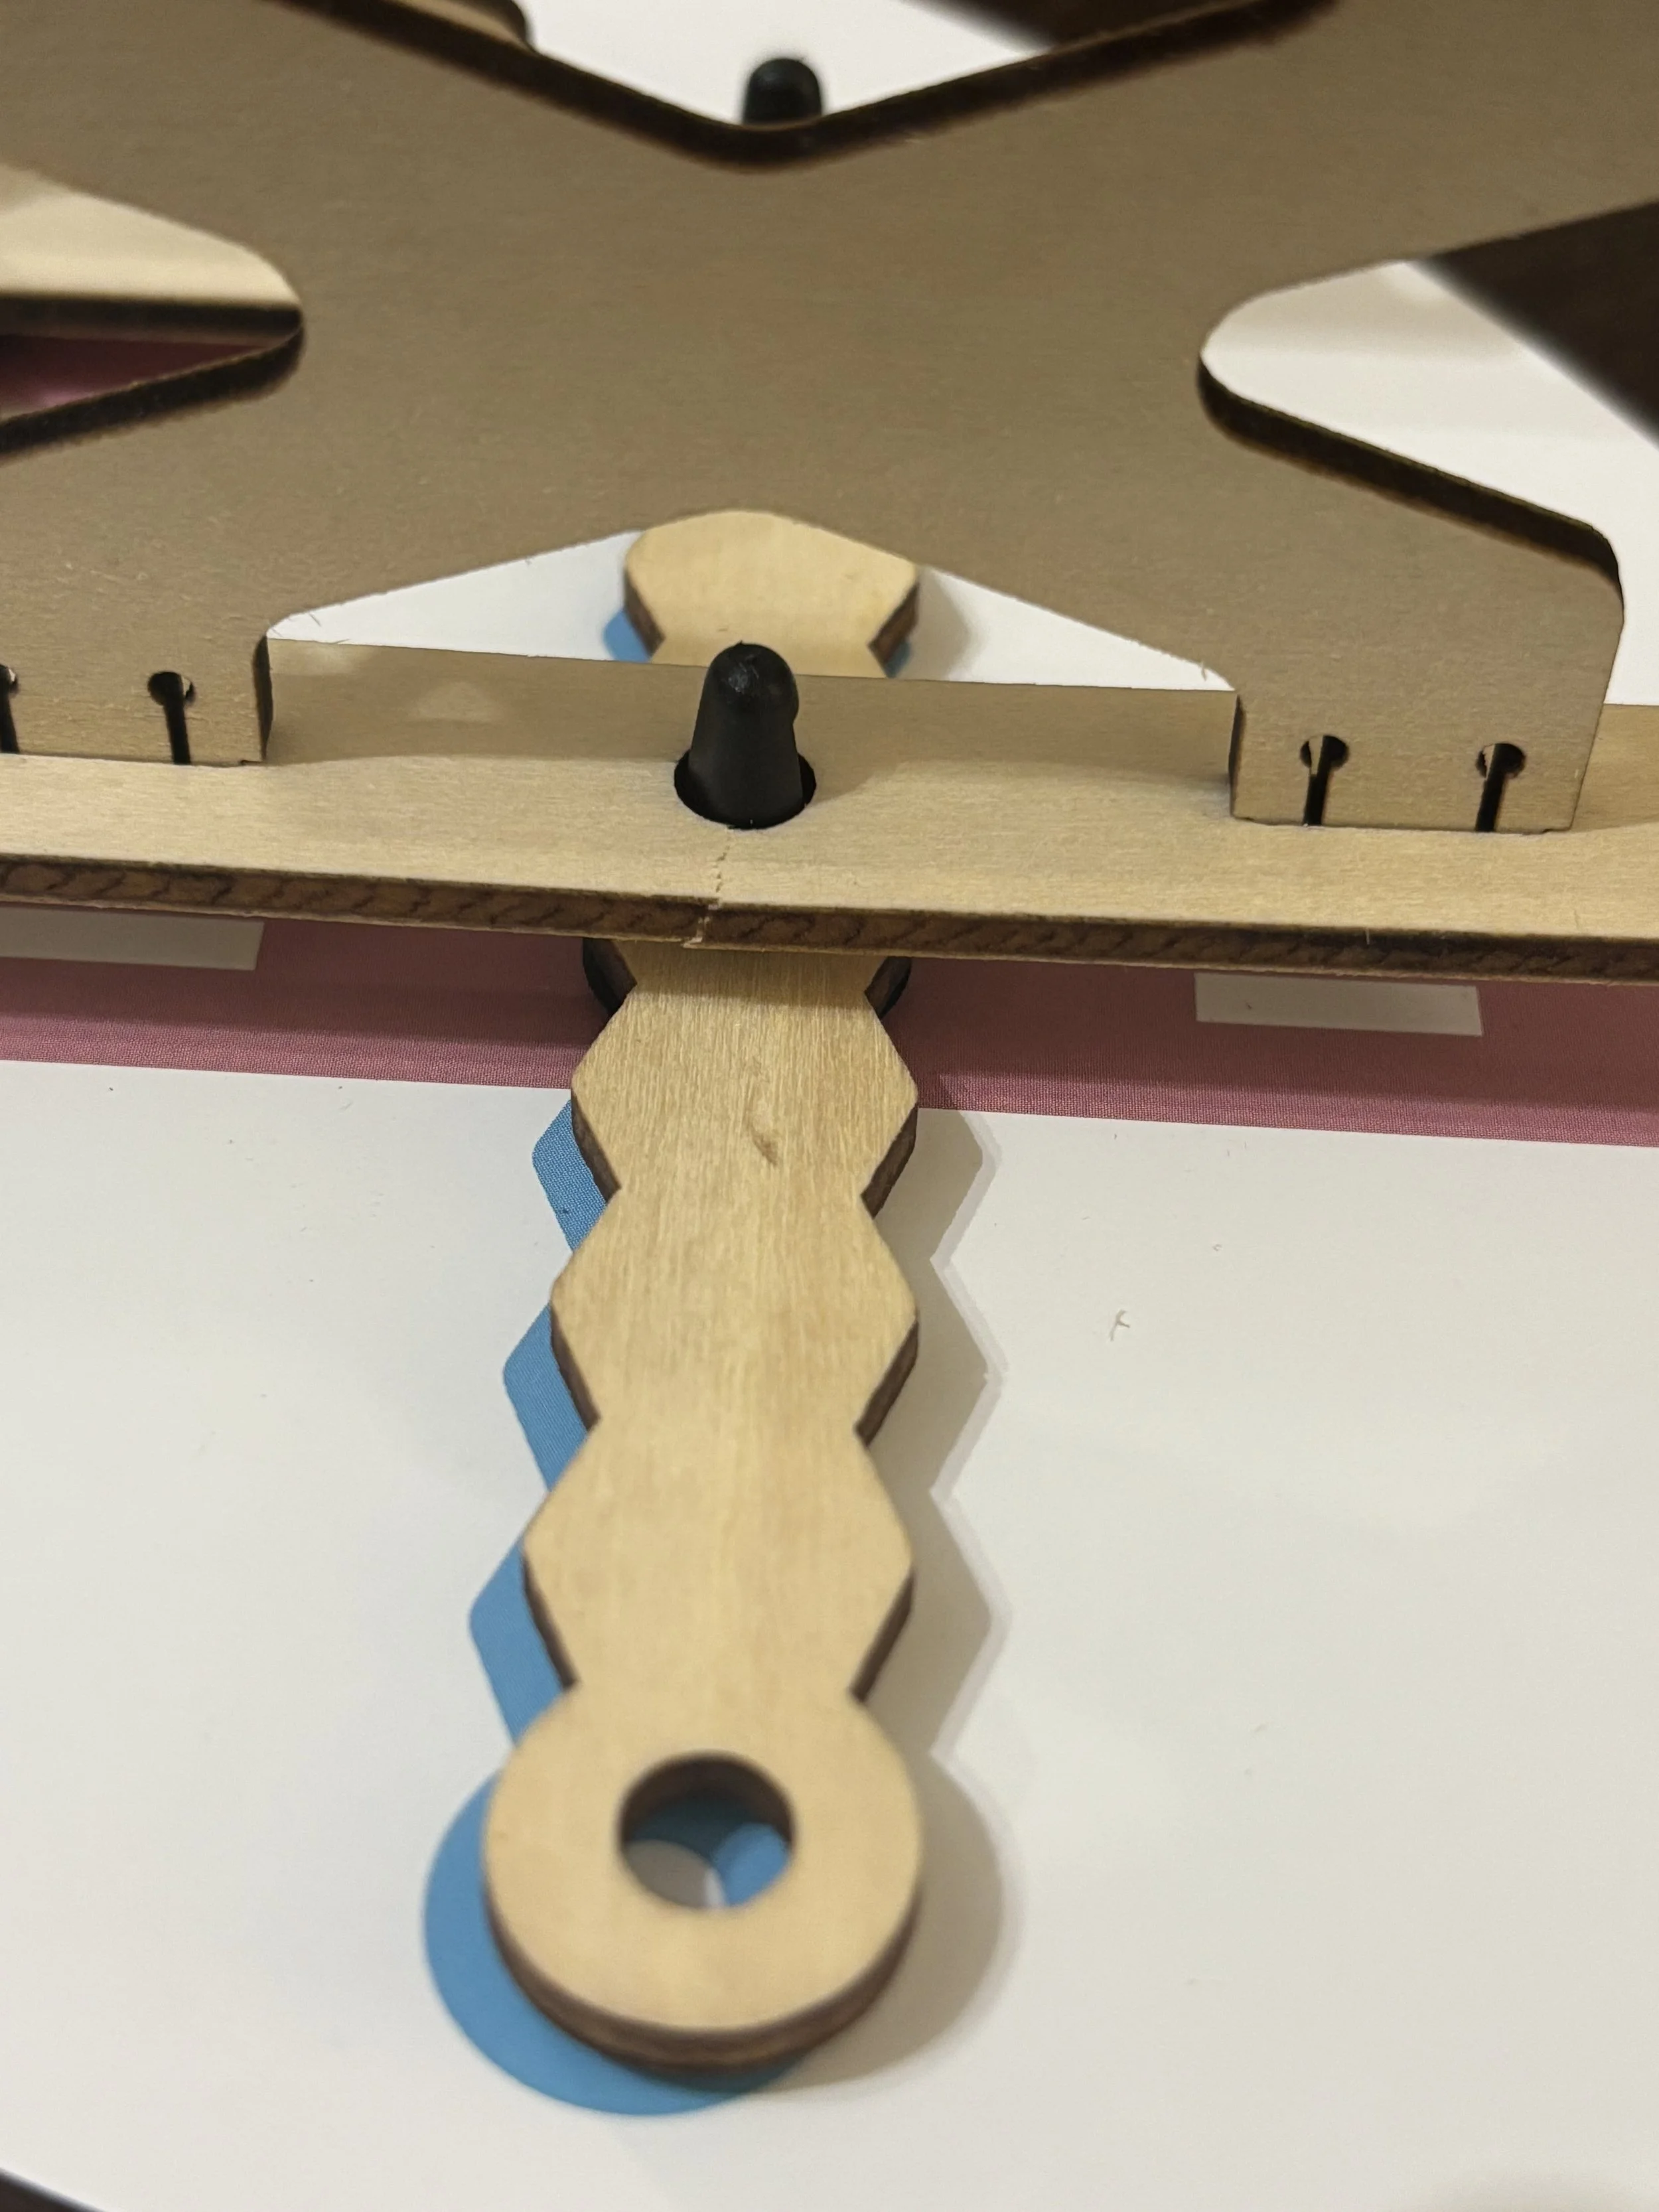
My only complaint about the building process was that the lightweight wood pieces used in this (balsa wood, I think) are very easily broken.
In fact, I cracked one of the cross-beams as we were installing it. Thankfully the lift still worked!!!
On the other hand, I have had similar experiences with KiwiCrates’ materials. So, I think it is just one of the downsides of using such light-weight wood. However, I wouldn’t want to pay the price to ship heavier wood!
All things considered, I think adult supervision is a good idea. Granted, I was the one who pushed the piece too hard and cracked it (not my kid)!
The Apps
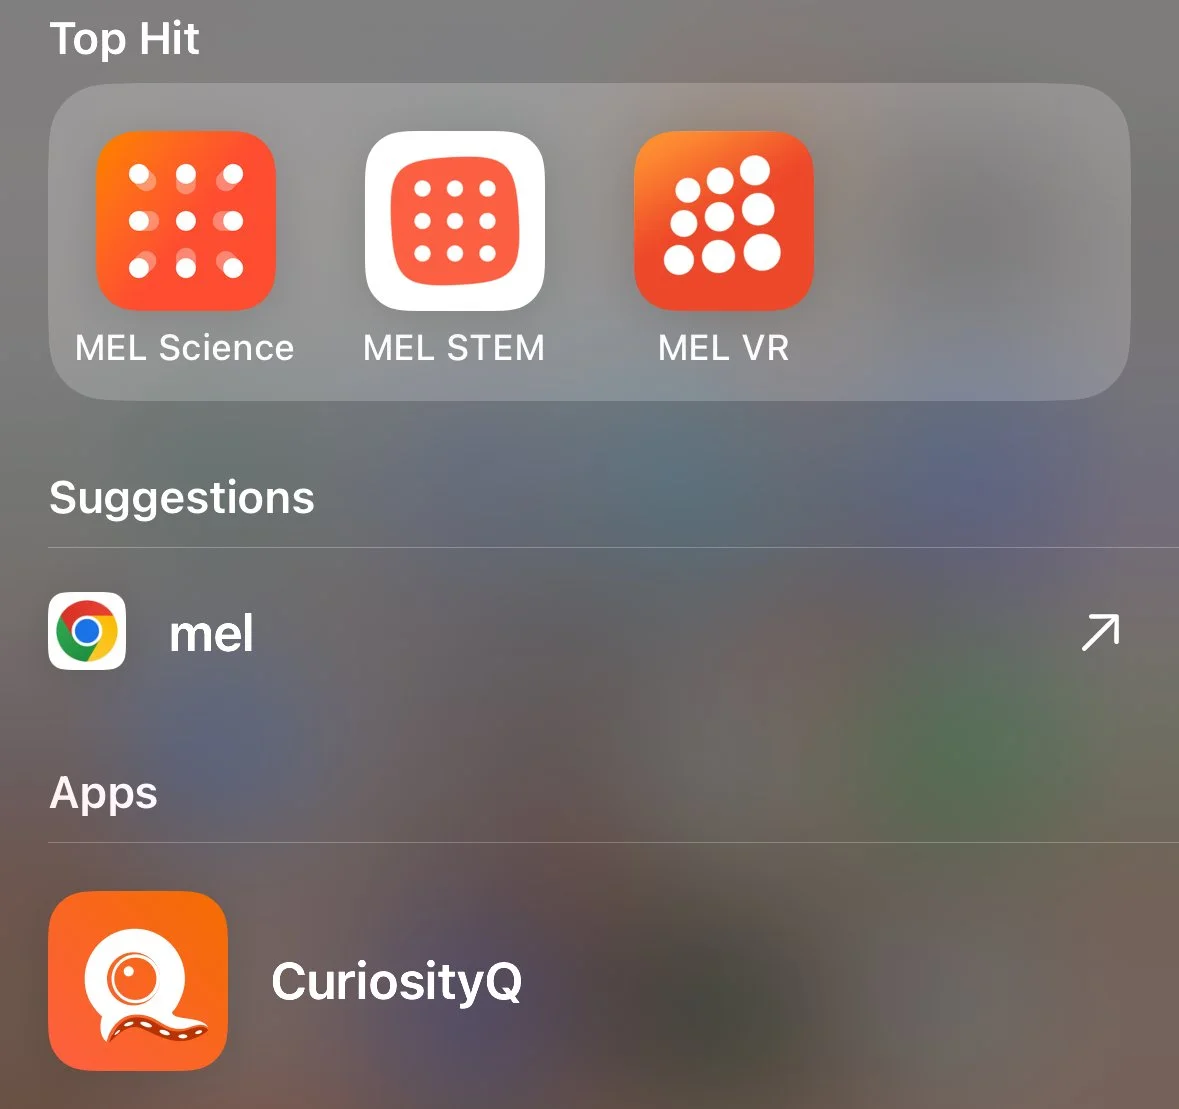
I found 4 apps that are associated with the MEL brand, which were mentioned in the box or on their website. So, I decided to break these down here. You can see a screenshot from my phone showing all four icons.
MEL Science App
This appears to be the main app and ties to your subscription account.
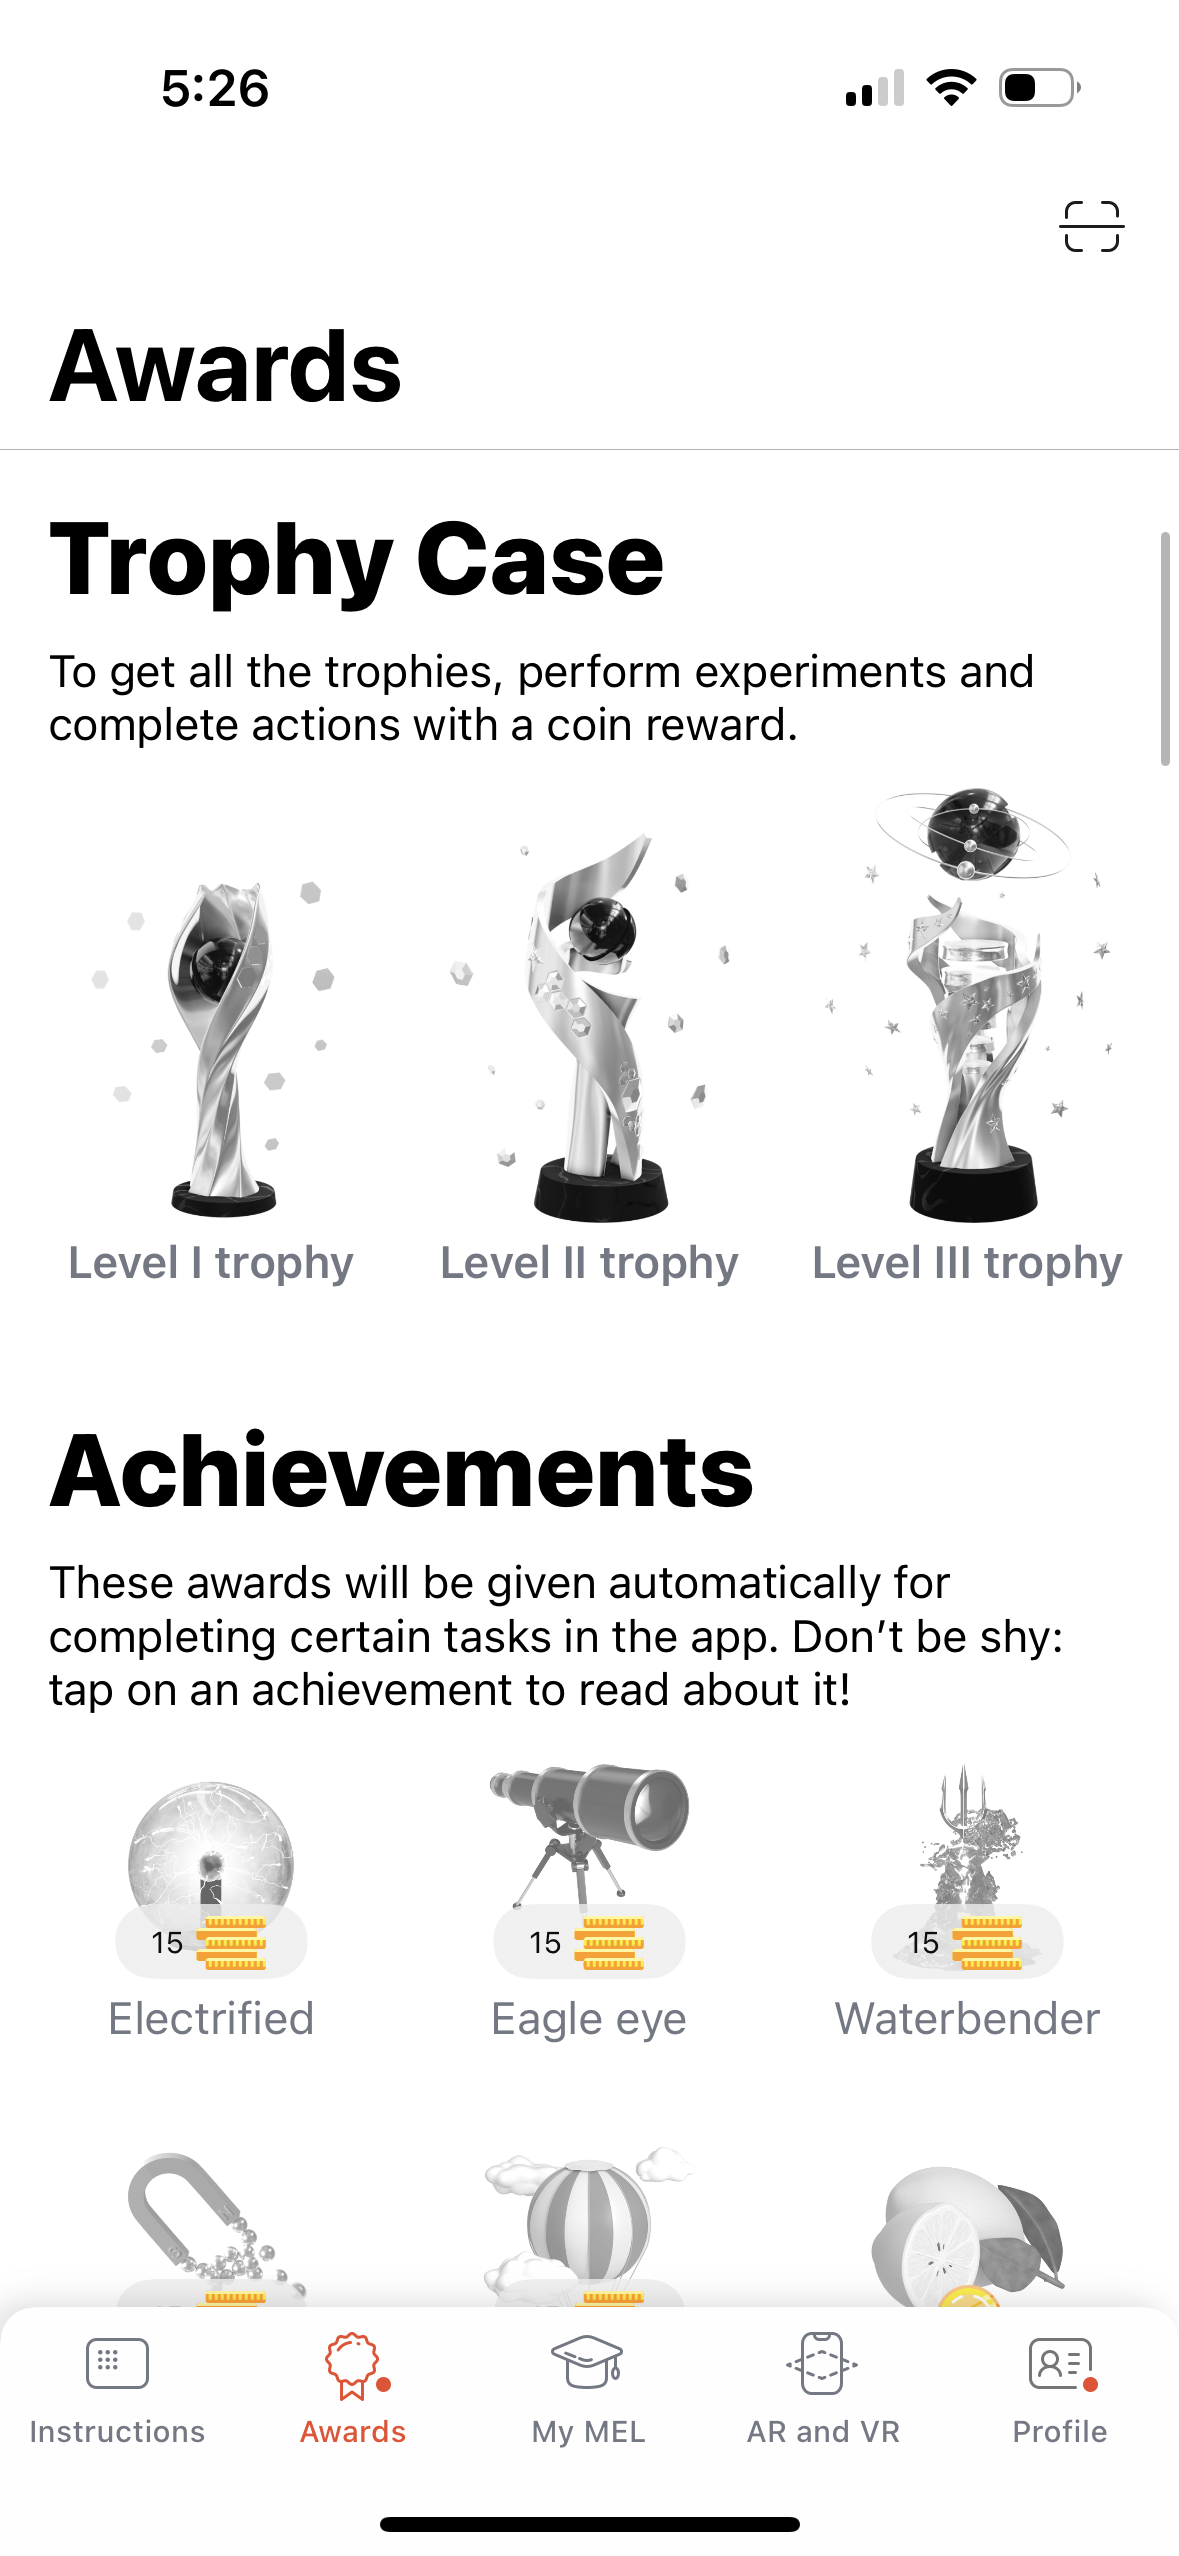
I love how they have gamified this. Here you’ll see a photo of the “achievements,” based on activities such as uploading pictures of completed experiments to the app.
There is an option to upload a photo of your completed build. When I added one, it gave me “coins” as an award. I thought this was a brilliant gamification idea to make the app more fun.
Once you select a specific category, it shows all of the boxes included in that category.
After selecting the Hydraulic lift experiment, it shows some basic info about it as well as a GIF style video of it working.
From there I could tap on the GIF and then hit “start lesson” to be taken to the MEL STEM App described below.
MEL STEM App
This app has the Virtual Reality videos/activities that correspond with their STEM line.
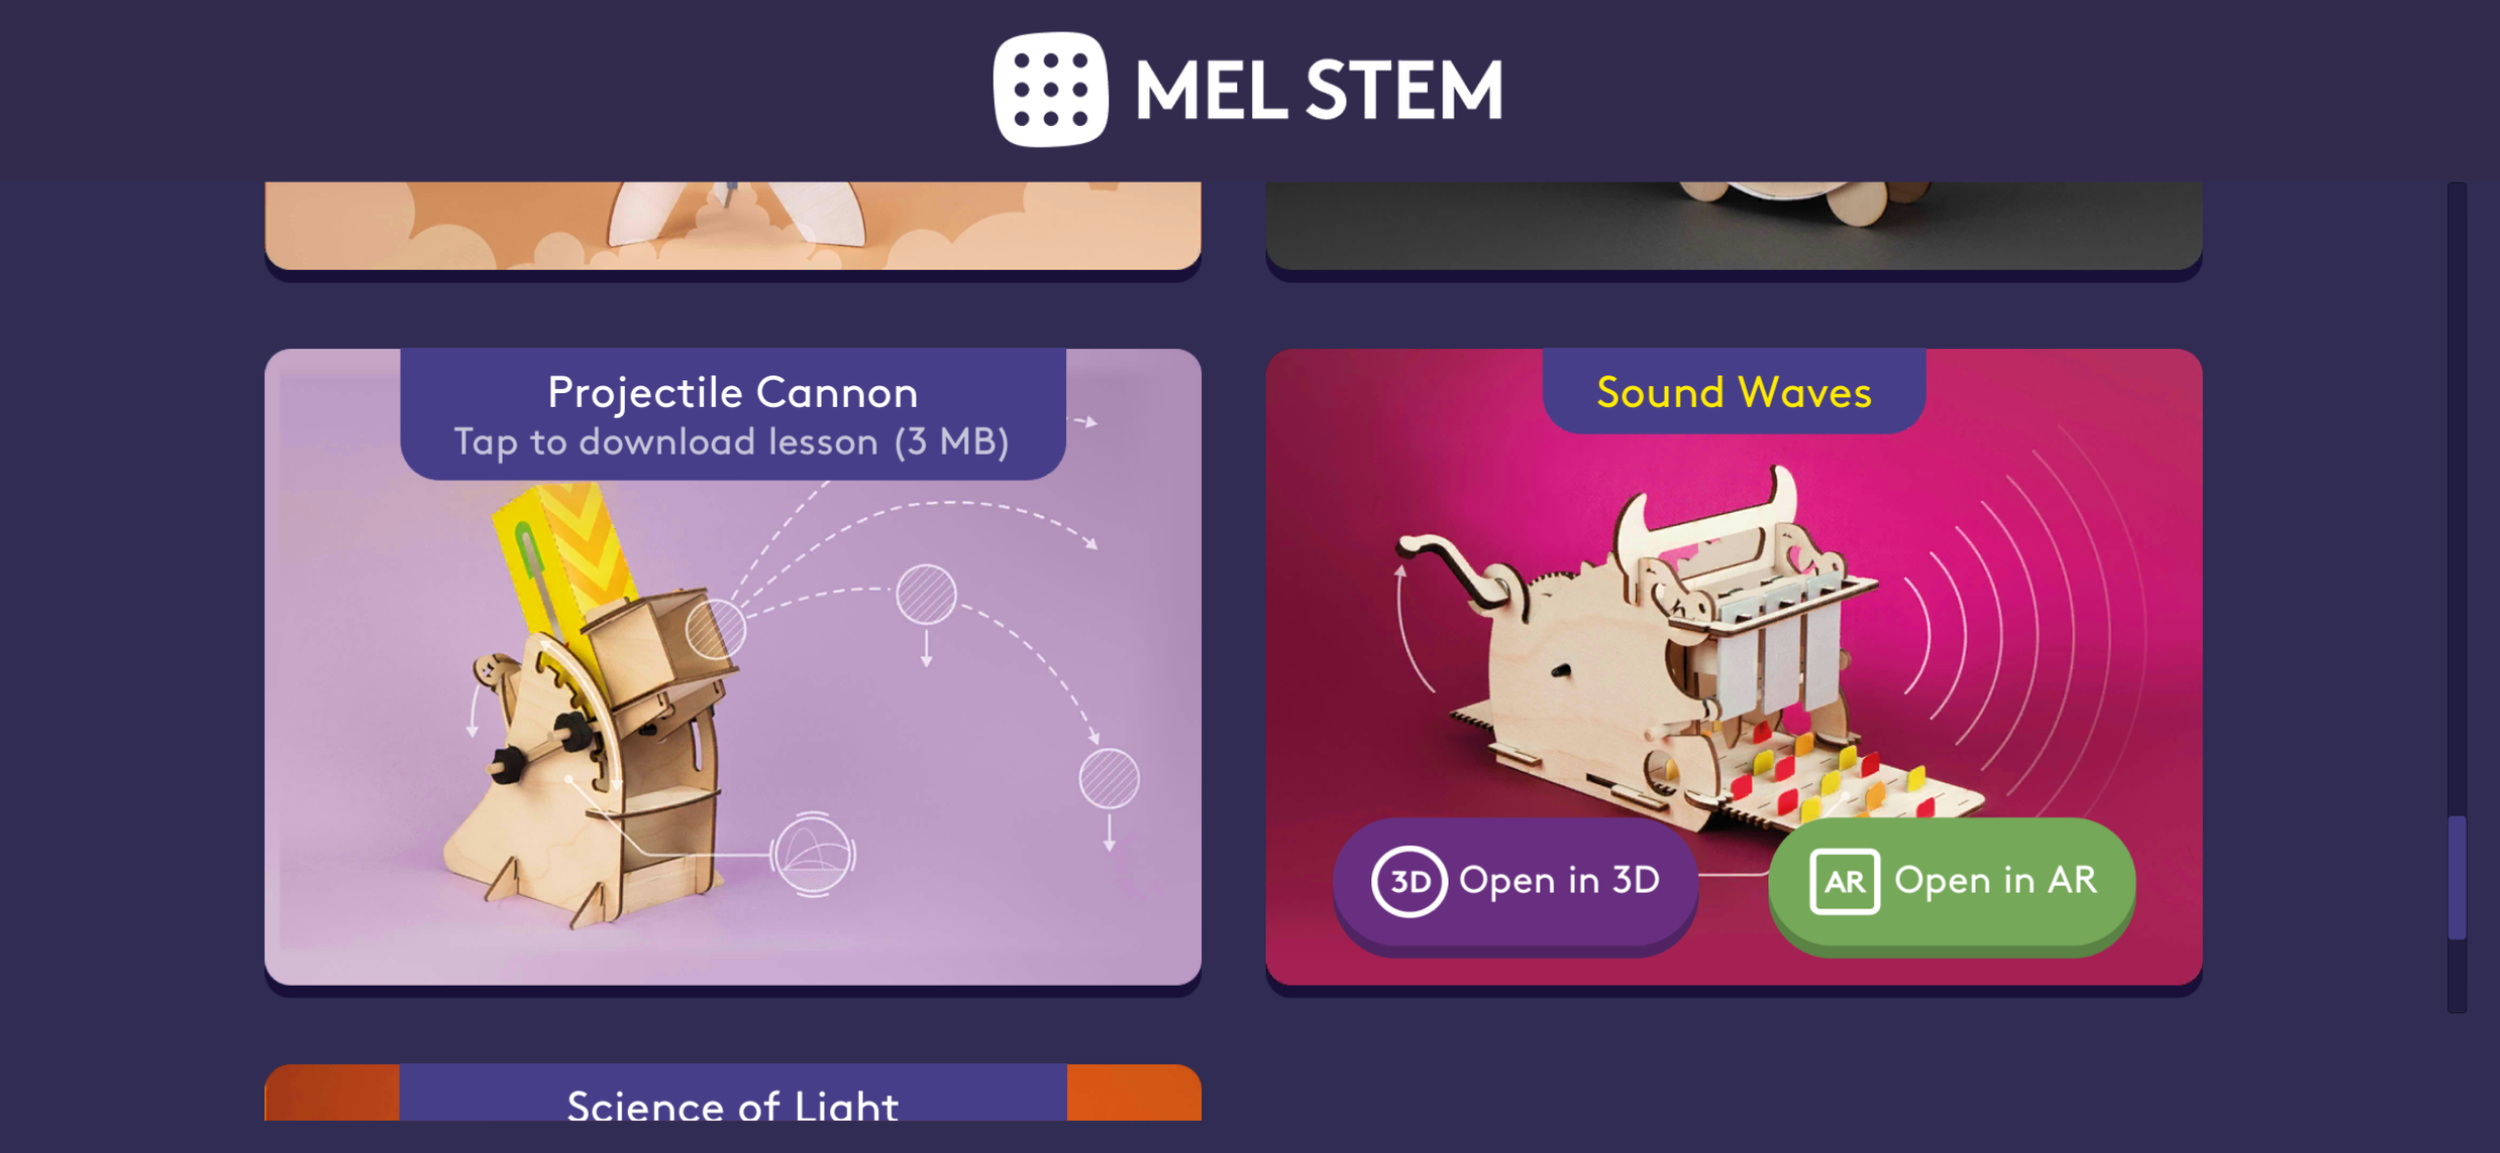
After you “download” a particular lesson, it pops up with the options to either “Open in 3D” or “Open in AR.” I tried both. Each was really neat.
With the VR, you actually moved the phone around (you have to grant the app access to your camera). It looked like it was sitting on my desk. It briefly explained some of the features of the experiment.
At first the volume didn’t play because my phone was on silent. So, I was confused about when I should press the forward arrow. So, be sure to try it with the volume turned on. I’d still recommend MEL adjust it to let you know when it’s time to click to the next section, since the text on the screen made me think I could watch it silently and still get the full experience.
Also, the website refers to “step by step” videos, but I found out these are specific to the Chemistry, Physics, and Math boxes - NOT the STEM ones.
In this app, the hydraulic lift VR had a feature where you could add levels to the scissor mechanism as well as virtually push and pull it to make the VR model move. I love this virtual reality learning feature!
MEL VR App
This app has videos that are specific to Chemistry and Physics. I think you could just watch these to learn from them. They did not correspond to the hydraulic lift box we did.
You can also use them with 3D mode on your phone or with the cardboard VR goggles (included with an annual subscription). These appeared to be geared more toward upper elementary and above.
CuriosityQ App
This one was referenced in the booklet that came in my box, but when opened it seemed to be almost identical to the MEL Science app mentioned above. So, I am confused about this one. (Again, I’ll update if given clarification.)
Ordering from the Website
If you go to the MEL Science website, you will see that they not only have the MEL Science boxes but also several others - Curiosity Box, MEL Med (for high school and up), Science4you (for ages 6 up), Kitchen Science, and MEL Chemistry Lite (10-16+ years).
After you select a specific line (like the MEL Science boxes), you’ll be given a choice to choose from one or more categories: Chemistry, Physics, STEM, Math, and Space.
To my knowledge, you cannot order a one-off box or specify which one you want first. (I will edit this if I find out otherwise.) I believe you have to order a subscription and they will send a box from among the categories that you select.
Subscription Boxes and Pricing
Apparently I’m an idiot, because initially I was confused by the numbers under each category. They are ages recommended for that category, but I first thought it was how many boxes they had for that category.
Here are the available categories along with the number of boxes (as of November 2025).
Math (ages 8+) - 5 boxes
STEM (ages 5+) - 17 boxes
Physics (ages 8+) - 18 boxes
Chemistry (ages 10+) - 22 boxes
Medicine (ages 14+) - 8 boxes
Price
You can purchase 1 or 2 sets per month. I only looked at the single box per month prices.
First, you select which category you’d like the boxes from and they will send one from your chosen subject(s) each month. You can switch subjects at any time.
The price per box ranged from $29.90-$39.90.
You have to pay shipping (to the US) on top of this.
Here is the breakdown for each payment frequency:
Pay Annually
$29.90/set for total of $358.80. Includes free VR Cardboard goggles. Pay once a year.
Pay Semi-Annually
$34.90/set for two $209.40 payments per year. ($418.80 total per year)
Quarterly
$38.90/set for total of $116.70 each quarter ($466.80 total price for the year)
Monthly
$39.90/set for a total of $478.80 over the course of the year
Final Thoughts
Fun
My son and I really enjoyed the project.
I was impressed by the quality of the printed materials.
The quality of the hydraulic lift components was comparable to kits I have used before. They worked well, but you have to be careful not to push or pull too hard as you construct it because the pieces are delicate.
My Suggestions for MEL
The apps are a great concept, and I love that they have the virtual reality or 3D options. However, I would combine it all into 1 app to make it simpler for the user. I found we had to download several apps to access all of the features, and they were somewhat confusing.
I also would love if they had a step-by-step video of someone building the kit for kids to watch. (I ended up finding one on You Tube here, but would love for the link to be included in the kit.) I had expected that from the “Video Guides” referenced on the website. EDIT: I found out that they typically have video guides for the Chemistry, Physics, and Math boxes but the written booklet for the STEM activities. This make sense as the STEM activities are geared toward a younger audience.
I also found the kit to be somewhat more expensive than its competitors. And, in the US we have to pay shipping. So, it may be a better option for UK subscribers or others located closer to them.
My suggestion to MEL would be to try to lower your costs to make the price more competitive for US subscribers. I’d include the supplies list, instructions, and the cartoon in the booklet, and perhaps 1 page at the end to explain the concept. Then, I would put the remainder of the pages (coloring sheet, seek and find, examples in real life, etc.) online with access to these from a code included in the kit.
Would I Purchase This?
I would absolutely try one of the Chemistry boxes if I could purchase a specific one without having to start a subscription. However, I didn’t see this option on the website. They have a monthly charging feature but that still requires purchasing (and then cancelling) a subscription.
So, if you are looking for an new subscription box for your science loving kiddo, and can afford the price tag, I think MEL has some fun activities!
And, if you’d like to check it out, feel free to use my link and code TUTOR50 to get 50% off your first box.
Further Reading
I found this article, The Best Stem Box Subscriptions, from StemGeek.com, where they highly recommend the MEL Chemistry kits. In fact, MEL Chemistry was given the “Top Science Box” award.